Showing posts with label recipe. Show all posts

Monday, June 14, 2010

Tom Kha Gai, or "How Rebekah is Ashamed for Never Posting"

Yeah yeah, don't rub it in. I could share a whole HOST of reasons why I haven't updated in forever, but basically I've just been rotating the recipes I've already shared and haven't cooked anything new! However, I am going to start EARNESTLY trying to post something new every week. If not a new recipe, then a features article about food or cooking! Please forgive me, loyal readers. If you have any specific foods that you'd like to see on this blog, leave me a comment and I will try my best to find a great recipe! Now, onto today's recipe...

A little background, I love Thai food. If you don't, you should, because Thai food is AMAZING. I love the bold flavors, and the fresh vegetables, and how light everything is. I'm not exactly a calorie-counting kinda lady, but even I am prone to feel guilty when I eat ridiculously greasy food, but Thai food never makes me feel bad. The two dishes I love best are Gai Pad King (ginger chicken) and Tom Kha Gai.

Tom Kha Gai is a chicken soup made with coconut milk. It's creamy and a bit sweet, but not too sweet. Not everyone's a big fan of soup as a filling dinner, but if you stir in some brown rice, it's as satisfying as anything else you could eat. You'll have to forgive my picture quality (taken on my cell phone, since we couldn't find the camera) and the not-exactness of the recipe... I took ideas from several recipes I found online but I pretty much made this up, and it turned out just as good as any restaurant's version! Since this is a bit touch-and-go, if you're not feeling brave enough to try out a brand new recipe without exact amounts, I'd suggest getting some at a Thai restaurant so you know what it's supposed to taste like. If you're in Marysville, Mae Phim has a great version of it (Mai's Thai, which is my favorite for all other things Thai, has a version that is a bit more sour than I care for) and if you're in Rexburg, Original Thai's recipe is spectacular! Give it a try!


1 lb boneless skinless chicken
Chicken broth
One can of coconut milk
Ginger (I used ginger paste, which worked out awesome)
Green onions
Fish sauce
One small can of mushrooms
One small can of baby corn
One lemon (for zest and juice)
Red pepper flakes
Dash of garlic powder

Cut the chicken into bite sized pieces and saute it with a little bit of vegetable oil until it's done. Set aside. About the chicken broth... I started off with two cups of it and added half a can of coconut milk, but then I decided I wanted to use ALL of the coconut milk, which you must DEFINITELY shake before adding, so I added two (or so; what did I say about not being exact?) more cups of broth. In this instance I would HIGHLY HIGHLY suggest picking up some Better Than Bouillon Chicken Base so you aren't constrained by cups or cans or boxes. It's really easy, you just boil water and add some of the paste until it tastes good to you, and it's not horribly salty like normal bouillon cubes or powder. Stir in some ginger paste (or fresh slices, or powder, I'm sure the overall effect will be the same but the paste was quite successful in my experience) until you can just taste the ginger without overpowering the other flavors. Of course, if you like ginger, feel free to add more, but there I go again. Wash and slice the white part of the green onions and add them to the mix. Chop up some of the green part of the onion and set it aside for garnish. Now onto the fish sauce. Fish sauce smells nasty, people. Try not to let it bother you, though, because its effect is astounding in this soup. Add a few tablespoons and prepare to be amazed, though I would suggest not inhaling it before you add it as it might deter you from doing so. Drain the mushrooms and the baby corn and add it into the mix. If you have a lemon zester tool, add some zest to the soup. If you don't, no worries. Whether or not you added the zest, cut the lemon in half and squeeze some juice into the soup, but not too much. If you want your soup with a bit of a kick, add some red pepper flakes. Stir in a dash of garlic powder, and season with a bit of salt and pepper if you wish, and let it simmer for about 20 minutes. Dish up some brown rice in your bowl and then add the soup itself. Put some of those sliced green onions on top to give it a little more color and yet another different flavor.

Verbose much? I'm going to work on this recipe, to see if I can make it a bit more specific, but even now this soup is awesome and completely worth the guesswork. I'm really proud of myself for how it turned out and I highly recommend it. Nathan loved it and couldn't stop eating it :) He had to eventually, though, because it was all gone. It was that good.


Like I said earlier in the post, if you have any suggestions of things you want me to cook or write an essay about, please leave them in the comments! If I get requests, I'll be more motivated to post regularly! Cheap move, I know, but cut me some slack.

Friday, March 26, 2010

Day Six: Crockpot Lasagna!

All credit for this recipe goes HERE HERE HERE HERE HERE

My friend Kayla linked me to it on another blog site, and I've made it twice so far! I really like it, but I used half of the ricotta cheese the recipe suggests and I still thought it was a little much. I'm going to post the recipe to the way I did it but make sure you check out the link :)

Crock Pot Lasagna

1 pound ground beef
1 whole onion, finely chopped
2 cloves garlic, minced
1 jar spaghetti sauce (THIS is really good, and cheap!)
1 small can tomato sauce
8 oz ricotta cheese
¼ cups milk
1 egg
16 oz shredded mozzarella cheese (we only had 8 oz but it was good)
½ cups shredded parmesan/romano cheese
1 package (8 oz.) no-boil lasagna noodles (we used homemade noodles!)

Brown the beef, onion, and garlic in a frying pan. Drain off any grease. Add the spaghetti & tomato sauce into the browned meat mixture. Mix well. In a separate bowl, mix the ricotta cheese, milk, and egg. Beat until thoroughly mixed and smooth. Then mix in the mozzarella cheese and the grated cheese, so that all the cheeses are combined. Grease the crock pot with some Pam or shortening.

Put about 1/4 of the meat and sauce mixture in the bottom of the crock pot. Put a layer of noodles on top of that (break or cut them if needed). Put about 1/3 of the cheese mixture on top of that. Then repeat with sauce, noodles, cheese for another 2 layers. Top with meat sauce. Cook on low for 4 to 6 hours or until noodles are tender. (Since our noodles were homemade yesterday, we cooked it for three hours and it was great!)


We had my fake-son Gary over for a belated birthday dinner (he turned 19 on Wednesday) and I also made him a CAKE! It wasn't homemade, unfortunately, but it was pretty danged delicious. Triple chocolate fudge cake with cream cheese frosting. Soooo delicious.

 (Yes, those are matches instead of candles...)

Enjoy some classy cake-eating pictures after the cut!

(Late) Day Five: Things you can make with Cream of Mushroom soup!

I'm not even kidding right now.

I looooove Cream of Mushroom soup. It's so good by itself, but the magic of this soup are the things you can do WITH it. This post is dedicated to my mom, who is the QUEEN of things made out of Cream of Mushroom soup. My parents have soooooo much of this soup in their basement, and they hardly ever make it as regular soup. I will preface the recipes by saying that the soup is NOT a pretty soup to look at. It's gray. All of the recipes I'm going to share are going to end up gray. They're not particularly aesthetically pleasing, but if you can get past the color palette, your taste buds will thank you. I have never been disappointed with any of the recipes I'm going to share.

I'll start with the weirdest recipe first, with the least appetizing name.

Tuna Sauce on Rice

1 can of Cream of Mushroom soup
1 can of tuna, drained
1/2 soup can of water
Cooked white (or brown, I guess) rice
Random seasonings... garlic powder, Mrs. Dash, black pepper, whatever

Dump the soup, tuna, and water in a saucepan. Stir it up until everything is uniform and the tuna chunks are all broken up. If you have a cat, leave the tuna can out for them to finish off. Turn the burner onto medium heat. Add some random seasonings. The ones I listed are the ones I prefer, although you can really go any which way. It's going to turn out good. When the sauce is bubbling, serve it on top of rice. SO good.


Really Really Really Good Roast Beef

This is probably the easiest recipe I've got for you today. You can make it in a crockpot or a regular roasting pan, and I'm not going to worry you with cooking times, since it all depends on the size of the roast, which method you use (oven or crockpot), and how well-done you like it. Google :)

1 envelope (Lipton) onion soup mix
1-2 cans Cream of Mushroom soup (depending on the size of the roast)
ROAST BEEF, unroasted
Vegetables that I like with roast beef: carrots, potatoes, and onions

If you're making this in the crockpot, put about a half cup of water in the bottom. If you're putting in carrots, put them on the bottom of the pot, since they take the longest to cook. Put the roast on top of the carrots (or on the bottom of the pot if no carrots are present) and assemble the potatoes and onion around it. Mix the onion soup mix with the Cream of Mushroom soup and spoon it on top of the roast as evenly as you can. You can season it with other stuff, but NOT SALT, since the onion soup mix is plenty salty. Figure out via the internet (or just... memory if you've been cooking roasts a lot) how long it needs to be in the crockpot! Here is a good chart of crockpot cooking times!

If you're making it in a roasting pan, there is no need to add water, but make sure the carrots are at the bottom of the pan, although they don't need to be underneath the roast this time. Same rules apply otherwise though! Cook it at 300 or 325 for however long... It's all really dependent on how big your roast is and how done you like it. Here is a good article about oven roasting.

If you have leftovers, you can chop them up and use them in the next recipe!


Beef Stroganoff

1 pound of ground beef
1 onion
1 can cream of mushroom soup
1/2 soup can of water or milk
Extra sliced mushrooms, if you wish
Mrs. Dash (table blend is the best)
Sour cream

Cook the ground beef with the onion until both are fully cooked. Saute the mushrooms separately until they're soft. In a saucepan, combine the soup with the water and stir until fully mixed. Add the meat, onions, and mushrooms. Put it on over medium heat and season it according to your wishes. I would highly HIGHLY recommend Mrs. Dash for the stroganoff, but if you don't have it then salt, pepper, some onion powder, and just a BIT of garlic powder (I am quite liberal with it in the tuna sauce, but the stroganoff only needs a bit) will do you just fine. In the minute or so before you serve the stroganoff, add a healthy dollop of sour cream and mix in well. Serve it over noodles or rice.

Like I said, not that pretty, but mmmmmmm, delicious.

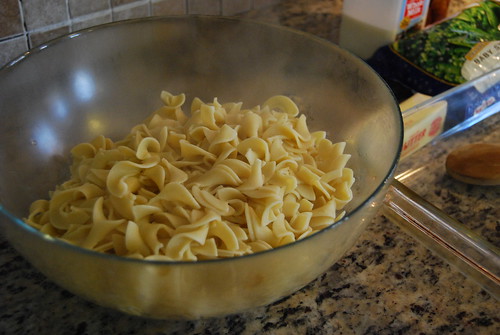
A note about noodles: it goes best, texture-wise, with something like penne, but I think that egg noodles like these ones are the BEST with stroganoff, although honestly, anything will do. Just don't do spaghetti, angel hair, linguine, fettucini or anything else along those long, skinny lines.


Day six will be up later this evening! We just have to make it first ;)

Monday, March 22, 2010

Day Two: Oatmeal Cream Pies

Nathan LOOOOOOVES Little Debbie oatmeal cream pies, and he found a recipe! They're super super fattening (probably) but I think in cases like these, it's best to just ignore the nutritional facts and enjoy them.

Oatmeal Cream Pies

Cookies:
1 cup margarine
3/4 cup brown sugar
1/2 cup sugar
1 tbls molasses
1 tsp vanilla
2 eggs
1.5 cup flour
1/2 tsp salt
1 tsp baking soda
1/8 tsp cinnamon
1.5 cup quick oats

Cream filling:
 2 tsp Hot water
1/4 tsp Salt
7oz jar Marshmallow Cream
1/2 cup Shortening
1/3 cup Powdered sugar
1/2 tsp Vanilla

-Directions-
1 Cream margarine, brown sugar, and sugar.
2 Add the molasses, vanilla, and eggs to the creamed mixture, stir until uniform.
3 Combine flour, salt, baking soda, and cinnamon.
4 Add dry ingredients to the creamed mixture; mix in the oats.
5 Drop dough by tablespoon on ungreased sheets.
6 Bake at 350°F for 10-12 minutes , or until brown around the edges.

Filling
7 In small bowl, dissolve the salt in the hot water.
8 Combine marshmallow, shortening, powdered sugar, and vanilla in med bowl; mix until fluffy.
9 Add the cooled salt water and mix well.
10 Spread filling on flat side of one cookie, press 2nd cookie on top.

Sunday, March 21, 2010

Day One: Mexican Lasagna

I know, I know, I've been MIA with this blog. I don't really have a good reason, but to make up for it, I am going to be posting a recipe every day this week, starting with this:

Mexican Lasagna

6-8 flour tortillas
1-16oz can of refried beans
1 lbs ground beef
1-16oz can of diced tomatoes
Taco seasoning
1 cup salsa
1 cup shredded cheese (colby jack, mexican blend, cheddar, etc)


Preheat the oven to 350. Spray the bottom and sides of a 9x13 pan with Pam or something. Put down 3 or 4 (depending on the size) tortillas on the pan. Spread refried beans evenly over the tortillas (you don't have to use the whole can). Cook the ground beef with the can of tomatoes (don't drain ALL of the juice away) and the taco seasoning--the kind we have says to use 1/4 cup for every pound of meat, but it varies between brands. When the beef is all cooked, spread the meat/tomatoes mixture evenly on top of the refried beans. Put 3 or 4 tortillas on top of that. Spread the salsa evenly on top of the new layer of tortillas. Put the shredded cheese on top. Bake in the oven for 15-20 minutes, or until it's bubbly. Serve with sour cream.


SO GOOD.

Friday, February 26, 2010

PIPPA PIE!

It started with a tweet...

I was watching the Olympics and saw some Canadian fans wearing some really cozy-looking mittens and I wanted some. I posted the following message on Twitter: "Any of my Canadian friends want to buy me some of those mittens? I probably won't pay you back hahah. jk jk but they do look cozy!" My lovely friend Pippa responded saying she had an extra pair and could be convinced into giving them to me. I told her to name her stakes. Embarrassing YouTube video? Done. Poetry? Done. She put a lot of thought into it and told me that in exchange for the cozy mittens, she would require me to make a new recipe specifically for her and post it to my blog. SO HERE WE ARE! I combined three delicious recipes to make, you guessed it--PIPPA PIE! (It must be in all caps when written about; when spoken, voices do not need to be raised.)


Pie crust, from the family cookbook:


1 1/3 cups sifted flour
1/2 tsp salt
1/2 cup shortening
3 Tbsp water


Combine flour, salt, and shortening until uniform. Add one tablespoon of water at a time. Work dough into a ball. Roll it out and put it in a pie pan. Prick the sides and bottom with a fork to release any air bubbles that form during cooking. Set the crust aside.


Sour cream peach pie filling, from About.com and adapted:


1/2 cup sugar
2 tablespoons flour
1/4 teaspoon salt
1 cup sour cream
1 egg, slightly beaten with a fork
1/2 teaspoon vanilla
1 29 oz can sliced peaches (drained

Preheat oven to 400°.  Combine sugar, flour, and salt; beat in sour cream, the beaten egg, and vanilla. Don't over-mix! The mixture will become too airy and not set well. Add sliced peaches. Pour mixture into unbaked pie pastry. Bake at 400° for 12 minutes. Reduce heat to 350° and bake 30 minutes longer. Remove from oven, but leave the oven on.


Crumbly topping, from the pear crisp recipe:

1/2 cup brown sugar
1/2 cup flour
1 cup quick oats
Dash of cinnamon
1/2 stick (1/4 cup or 4 Tbsp) butter or margarine 

Mix brown sugar, flour, oats, and cinnamon together, and then add butter. Spread it evenly over the pie. Put it back in the oven for 15 minutes.


This pie was REALLY good. It finished baking around 11 PM last night but that did NOT stop Nathan and I from eating two slices each. I don't know if this counts as making up a new recipe, since I combined three very good recipes to make one super delicious pie, but I hope it does. This pie is mind-blowing.


WHAT SAY YE, PIPPA?

Zuppa Toscana

Hey! Sorry for my absence. I really have no excuse except to say we've been making a lot of spaghetti and macaroni and cheese due to not-feeling-well and general laziness. But I'm back with one of my favorites: Zuppa Toscana! I mentioned it in my last post and will now be sharing the goodness with you! I stole was given the recipe by my mother-in-law and has since been a hit with my siblings and my fake son Gary, who we have over for dinner as often as he wants to walk the half an hour to our apartment from his dorm. More fans are forthcoming, I guarantee it.


Zuppa Toscana

1 lb. spicy Italian sausage
1/2 lb. smoked bacon - chopped
1 qt. water 
Two 14.5 oz. cans (about 3 2/3 cups) chicken broth*
2 (or more!) lg. russet potatoes - scrubbed clean, cubed
2 garlic cloves - peeled, crushed
1 med. onion - peeled, chopped
2 cups chopped kale OR Swiss chard
1 cup heavy whipping cream or half and half
salt and pepper - to taste

-In a skillet over medium-high heat, brown sausage, breaking into small pieces as you fry it; drain, set aside.

-In a skillet over medium-high heat, brown bacon; drain, set aside.

-Place water, broth, potatoes, garlic, and onion in a pot; simmer over medium heat until potatoes are tender.

-Add sausage and bacon to pot; simmer for 10 minutes.

-Add kale and cream to pot; season with salt and pepper; heat through.


I could eat this every day. Soooo delicious. It tastes BETTER than Olive Garden's version.


* A note about chicken broth: Getting the actual cans (or box) of broth is EXCEEDINGLY preferable to using chicken bouillon cubes or powder to make the broth. I learned from experience that bouillon makes it extremely salty. There are other options for broth (such as the "Better than Bouillon" paste) that I haven't tried yet, but canned or boxed chicken broth hasn't failed me yet!

Wednesday, February 17, 2010

Homemade Alfredo!

So Nathan and I eat a lot of pasta. It's cheap, quick, and easy, and a few well-chosen additions to the tomato sauce (not to mention Nathan's yummy homemade noodles) lead to a pretty tasty and satisfying meal. I've had bottled alfredo sauce before and I never really liked it, but I thought I'd give homemade a shot. I found a recipe at allrecipes.com that got great reviews and looked pretty easy. I changed it up a bit due to the ingredients we had available.

Here's what I did:

3 tablespoons butter
8 fluid ounces (1 cup) half and half
1/2 cup Italian 4-cheese blend (we got it at G's Dairy Delights)
1.5 tsp sauteed chopped garlic
1 egg yolk (beaten with a bit of half and half)
A shake or two of Italian seasoning
Salt and pepper to taste

Melt butter over medium heat. Add half and half, stirring constantly. Stir in cheese and garlic. Stir constantly until the cheese is melted, then mix in egg yolk slowly. Add the Italian seasoning and salt and pepper. Simmer until it reaches the desired consistency. Ta-da!

(I also added some canned chicken so Nathan could get some protein from somewhere besides peanut butter--I would've put in fresh chicken, but I didn't think to defrost it before it was too late. It tasted great but the canned chicken overpowered the sauce a bit. Next time I'll just let the sauce stand on its own, maybe with some homemade noodles!)


Also: you can find the best thing ever after the cut!

Monday, February 15, 2010

Pear Crisp

I loooooove this recipe. I stole it from the family cookbook that Nathan's mom gave me! It's so easy and guaranteed to be delicious! We had this as our Valentine's Day dessert yesterday and it really hit the spot after a homemade pasta dinner courtesy of my wonderful husband :) All credit goes to Aunt Marcy!

Pear Crisp (or Peach!)

2-29 oz cans of sliced pears (or peaches!)
1 cup brown sugar
1 cup flour
2 cups oats
Dash of cinnamon
1 cube (1/2 cup) butter or margarine

Preheat the oven to 350. Drain the fruit (leave a bit of juice in, but not too much or you'll have a soupy dessert) and put it in a 9x13 pan. Melt the butter (Protip: I recommend using a pot on the stove instead of microwaving it; it takes a bit more time, but the cleanup necessary if you use the microwave takes a lot longer than that). Combine the dry ingredients, making sure you break up any clumps of brown sugar. Add the melted butter to the dry ingredients and mix well. Put the mixture on top of the fruit in the pan and distribute it evenly. Put it in the oven for 25 minutes; check it. If the crispy part isn't bubbling, leave it in for five more minutes. There's no need to let it cool down once it's done, and it's flippin amazing with vanilla ice cream!

Note: If you're not feeding more than four people, just cut the recipe in half and use an 8x8 dish. The baking time remains the same. Enjoy!

Yummmm!

Awesome commenter Alex's suggestion: add a handful of frozen berries to the fruit! If you don't thaw them beforehand, make sure you drain the canned fruit very, very well! I am definitely going to give it a shot next time I make this dessert!

Saturday, February 13, 2010

Black Beans and Rice (plus bonus Tortillas)

Okay. I loooooove the Zatarain's version of Black Beans and Rice. It's great when you add canned chicken to it! I'd never had it from scratch before a few months ago at my in-laws house (and before you have to ask, YES, I hardly ever ate dinner at my own house for the entire time I was dating and engaged to Nathan... sorry Mom). It was a Sunday evening dinner, and we sat down to eat around 4:30. When I heard it was black beans and rice, I was really excited because I was thinking of something like the above picture.

But homemade black beans and rice is sooooo different. I wasn't prepared for the subtle tastiness that ensued, and when I called my mother-in-law for the recipe after the move to Idaho, I was taken aback at the sheer lack of ingredients and the sort of touch-and-go mentality of preparing it. I added a couple things to change it up a bit so she can't sue me for recipe infringement, plus I like throwing cheese into everything.

Black Beans and Rice

1 can of black beans, drained
1 can of black beans, mashed
1 lb ground beef (or whatever)
1 onion, chopped
1 tsp (or so) chopped garlic
1 (or 2) dried bay leaf (or 1 tsp or so if all you have is crushed)
Generous handful of cheese--I use Mexican blend
Red pepper flakes

Simple, right? Well the preparation is equally so. I have a fancy hand blender that I got as a wedding present that I used twice for this meal. I used it to mash up the can of beans, but that can be done just as easily with a fork. I also used the food chopper to chop up the onion, but again, that can be done with a knife and cutting board.
Mash one can of beans and mix it with the other (drained) beans in a saucepan over medium heat. Cook up the ground beef (or sausage) with the onion. When it's done, drain the grease and add it to the beans. Add the garlic, bay leaf, cheese, and red pepper flakes. Heat through. Make sure you taste it. If you think it needs more garlic, red pepper, or maybe some salt, go ahead and add it. Delicious!

[If you think bay leaves are poisonous, please read this. I wasn't sure myself, so I checked it out.]

After exhaustive testing, I've found that this amount of the black beans, proportion-wise, goes best with cooking 1.5 cups of white rice. (1.5 cups rice + 3 cups water)

The simplicity of cooking rice eludes most people (my husband, for one), but you can ALWAYS follow this formula: 1 part rice, 2 parts water. Boil the water, add the rice, cover, reduce to low temperature and simmer for 20 minutes without removing the lid. Fluff with a fork when it's done. Voila!

Once I made the black beans I didn't make rice. However, Nathan made tortillas! The next time we had black beans, I mixed the rice with the black beans and we put them in delicious homemade tortillas! It was fantastic. Nathan usually makes the tortillas, but I gave it a shot this last time and they definitely tasted great, but they weren't as pretty as his.

Definitely try out this great recipe for tortillas, which Nathan got from a YouTube video!

Bonus Tortillas!

3.5 cup flour
1 tsp salt
1/2 tsp baking powder
7 tbls shortening or vegetable oil
1 cup very hot water

Knead dough for 3 minutes, cover with a clean cloth, let sit for 15 minutes, separate into approximately 1.5 oz. balls, roll dough out until it's flat and round, place on hot pan (medium heat, maybe even less), flip when air bubbles form. Ta daaaa! It should make about 18 tortillas, but we've been averaging about 12 or so. They're really tasty!

The Youtube video, if you'd like to see it done.

Tuesday, February 9, 2010

Salsa! It's famous!

I mentioned this salsa recipe in my first post. This is the one my piano teacher showed me how to make but I changed several elements to make it more to my taste. For example, hers was REALLY spicy and while I like it when food has a kick to it, I haaaate when food is so absurdly spicy that you can taste nothing but the capsaicin. I also don't like jalapenos. It's not the hot-factor, it's the flavor. Am I weird? Maybe. But the nice thing about this recipe is there's room to change things around to suit your own personal taste, but the basic formula remains the same. I've had a TON of people tell me it's the best salsa they've ever had, so if you won't take my word for it, take theirs, and try this out!

Really really really ridiculously good-tasting salsa
(Nathan named it)

 4 cups chopped and drained Roma tomatoes (or 2 lbs chopped)
1 large white onion, chopped
1 bunch cilantro, washed and chopped (the leaves only! the stems are bitter)
1 can of tomato sauce
1 tsp minced garlic (or 1/4 tsp granulated)
Juice of one lime (protip: cut the lime in half and microwave for 15 seconds to make it easier to squeeze, but don't burn your hand!)
Red pepper flakes (to taste)

Combine the tomatoes, onion, and cilantro. Add tomato sauce until the salsa has reached the desired consistency (your call; I like mine a little runny, but my best friend likes it chunkier). Add the garlic, lime juice, and red pepper flakes. Taste it to make sure it doesn't need anything else. Salt and pepper are optional and rarely necessary. Stir well, cover, and chill for at least 2 hours, but overnight is best. Remember, the red pepper flakes get stronger the longer the salsa is kept. Share with friends, this makes a LOT. Great with chips, on tacos or taco salad, or with eggs!


I say it's famous because my friend Kristina, who is pretty well-known on Youtube and in the Harry Potter fandom, is a big fan of my salsa and mentioned it in a video once or twice. I used to bring it to her shows and she would bring the chips and we'd kind of sit around and eat it for a few minutes after the concert was finished... good times. Anyway, her shout-out gave my salsa a bit of street cred.

Kristina's Youtube: italktosnakes